由于一看到大佬搭的二次元api就走不动道,就想着自己也搭一个,但奈何没有服务器,于是想看看cloudflare+github能不能行,网上搜了一番,结果发现github存储库限制只有1GB的空间,悲痛欲绝之下,看到了Cloudflare R2正在向我招手😄,于是一通折腾,发现全网只有随机图片 API (部署于 Cloudflare) 这一篇教程,但部署比较难,于是就有了这篇文章,记录一下
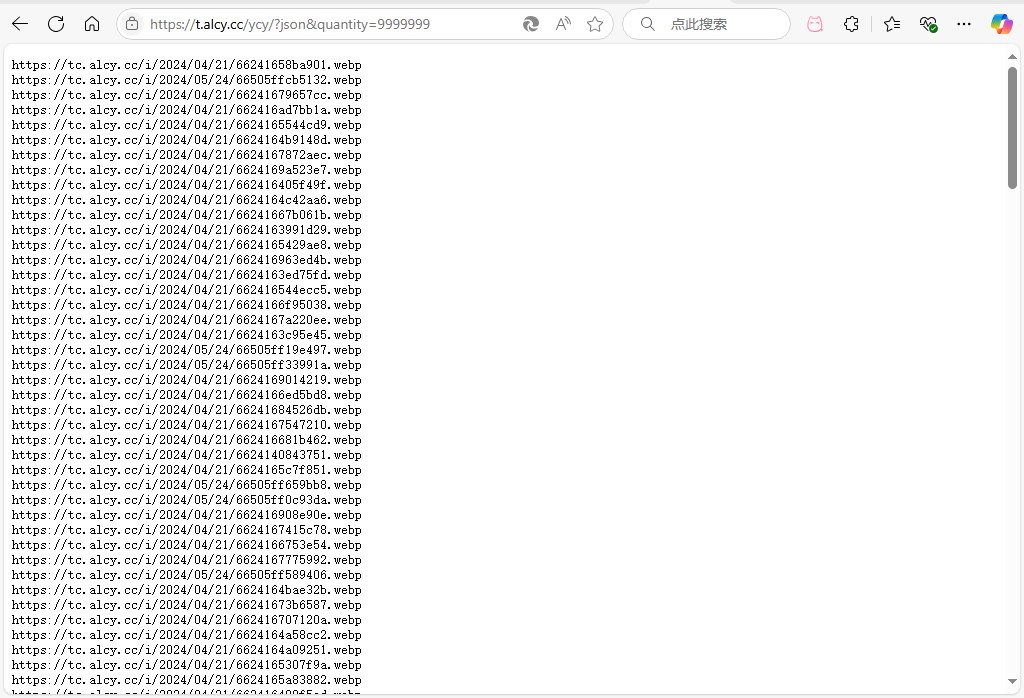
爬取二次元图片 话说要搭建二次元图片的api首先要先有图片吧,于是我就把魔爪伸向了举个栗子api (逃,,)本来想硬爬的,后来仔细看了看api文档,好像可以把所有图片链接都搞下来
1
2
3
4
5
6
7
8
9
10
11
12
13
14
15
16
17
18
19
20
21
22
23
24
25
26
27
28
29
30
31
32
33
34
35
36
37
38
39
40
41
42
43
44
45
46
47
48
49
50
51
52
53
54
55
56
57
58
59
60
61
62
63
64
65
66
import osimport requestsimport threadingdef download_file (url, save_dir ): try : response = requests.get(url, stream=True ) response.raise_for_status() file_name = os.path.join(save_dir, url.split('/' )[-1 ]) with open (file_name, 'wb' ) as file: for chunk in response.iter_content(chunk_size=8192 ): file.write(chunk) print (f"Downloaded: {file_name} " ) except Exception as e: print (f"Failed to download {url} : {e} " ) def process_txt_file (txt_file_path, save_dir, num_threads=5 ): if not os.path.exists(save_dir): os.makedirs(save_dir) with open (txt_file_path, 'r' ) as file: urls = [line.strip() for line in file if line.strip()] threads = [] for url in urls: thread = threading.Thread(target=download_file, args=(url, save_dir)) threads.append(thread) thread.start() if len (threads) >= num_threads: for t in threads: t.join() threads = [] for t in threads: t.join() def batch_download_from_directory (directory, num_threads=5 ): for root, _, files in os.walk(directory): for file in files: if file.endswith(".txt" ): txt_file_path = os.path.join(root, file) folder_name = os.path.splitext(file)[0 ] save_dir = os.path.join(root, folder_name) print (f"Processing {txt_file_path} ..." ) process_txt_file(txt_file_path, save_dir, num_threads) if __name__ == "__main__" : search_directory = "你txt文本的目录" num_threads = 5 batch_download_from_directory(search_directory, num_threads)
下载完成之后,所有图片就都爬了下来,值得注意的是,举个栗子api中还有一个特殊的api(acg动图),它是不能json请求的,所以就只能硬爬了
1
2
3
4
5
6
7
8
9
10
11
12
13
14
15
16
17
18
19
20
21
22
23
24
25
26
27
28
29
30
31
32
33
34
35
36
37
38
39
40
41
42
43
44
45
46
47
48
49
50
51
52
53
54
55
56
57
58
59
60
61
62
63
64
65
66
67
68
69
70
71
72
73
74
75
76
77
78
79
80
81
82
83
84
85
86
87
88
import osimport hashlibimport threadingimport requestsfrom mimetypes import guess_extensionURL = "https://t.alcy.cc/acg" THREAD_NUM = 5 SAVE_DIR = "acg" RECORD_FILE = "downloaded.txt" HEADERS = { 'User-Agent' : 'Mozilla/5.0 (Windows NT 10.0; Win64; x64) AppleWebKit/537.36 (KHTML, like Gecko) Chrome/120.0.0.0 Safari/537.36' } if not os.path.exists(SAVE_DIR): os.makedirs(SAVE_DIR) downloaded = set () file_lock = threading.Lock() record_lock = threading.Lock() if os.path.exists(RECORD_FILE): with open (RECORD_FILE, 'r' ) as f: downloaded.update(line.strip() for line in f) def get_extension (content_type ): """根据Content-Type获取文件扩展名""" ext = guess_extension(content_type) return ext if ext else '.bin' def download_image (): while True : try : response = requests.get(URL, headers=HEADERS) if response.status_code != 200 : continue content = response.content content_type = response.headers.get('Content-Type' , '' ) file_hash = hashlib.md5(content).hexdigest() with file_lock: if file_hash in downloaded: continue extension = get_extension(content_type) filename = f"{file_hash} {extension} " filepath = os.path.join(SAVE_DIR, filename) with open (filepath, 'wb' ) as f: f.write(content) with record_lock: downloaded.add(file_hash) with open (RECORD_FILE, 'a' ) as f: f.write(file_hash + '\n' ) print (f"下载成功:{filename} " ) except Exception as e: print (f"发生错误:{str (e)} " ) if __name__ == "__main__" : threads = [] for _ in range (THREAD_NUM): t = threading.Thread(target=download_image, daemon=True ) t.start() threads.append(t) try : while True : pass except KeyboardInterrupt: print ("\n程序已终止" )
至此,准备工作就以及完成了,如果有小伙伴不想爬虫的话,其实也是有现成的二次元图集的Github ,Github 这两个都是,可以直接上手(逃)
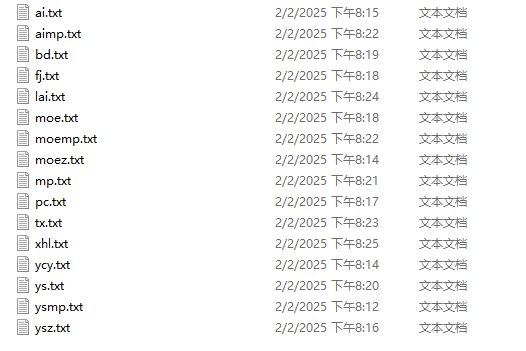
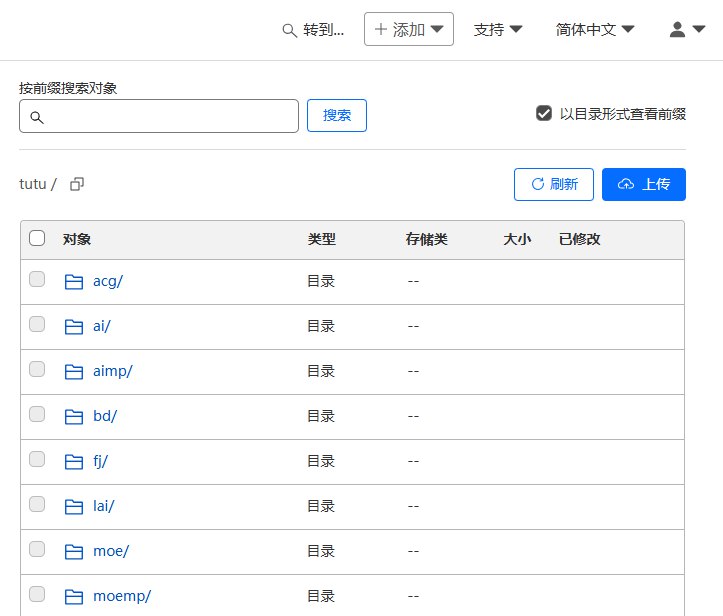
上传图片 进入Cloudflare R2创建一个存储桶,位置选亚太地区,然后把你爬到的所有图片都上传上去,由于R2上传有限制,不能批量上传,需要自己搭文件管理器Cloudflare R2 的完美搭档:R2 Uploader 使用指南
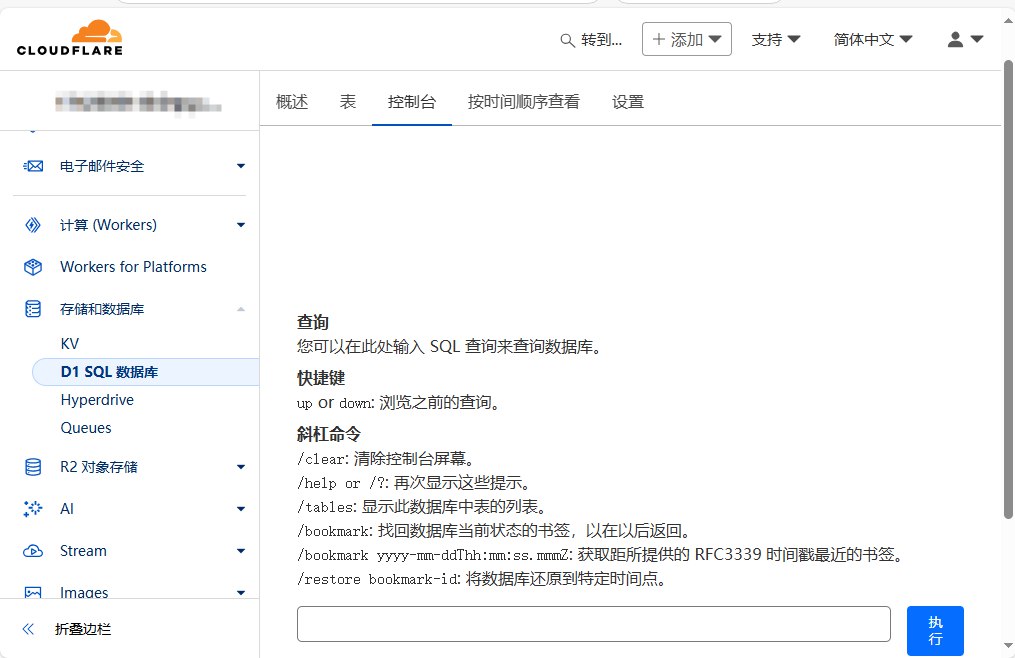
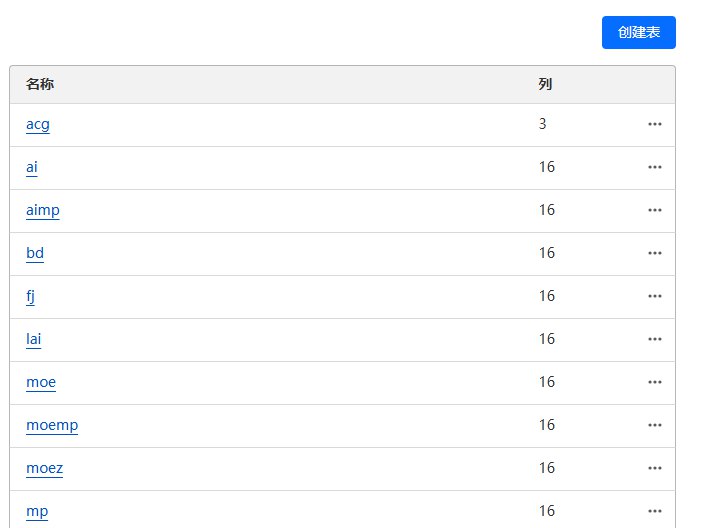
搭建api 我们进去Cloudflare,创建一个D1 SQL数据库,名字随意,然后电脑桌面创建一个index.html文件
1
2
3
4
5
6
7
8
9
10
11
12
13
14
15
16
17
18
19
20
21
22
23
24
25
26
27
28
29
30
31
32
33
34
35
36
37
38
39
40
41
42
43
44
45
46
47
48
49
50
51
52
53
54
55
56
57
58
59
60
61
62
63
64
65
66
67
68
69
70
71
72
73
74
75
76
77
78
79
80
81
82
83
84
85
86
87
88
89
90
91
92
93
94
95
96
97
98
99
100
101
102
103
104
105
106
107
108
109
110
111
112
113
114
115
116
117
118
119
120
121
122
123
124
125
126
127
128
129
130
131
132
133
134
135
136
137
138
139
140
141
142
143
144
145
146
147
148
149
150
151
152
153
154
155
156
157
<!DOCTYPE html > <html lang ="en" > <head > <meta charset ="UTF-8" > <meta name ="viewport" content ="width=device-width, initial-scale=1.0" > <title > SQL Generator</title > <style > body { font-family : Arial, sans-serif; margin : 20px ; } .container { max-width : 600px ; margin : auto; } .input-group { margin-bottom : 15px ; } .input-group label { display : block; margin-bottom : 5px ; } .input-group input , .input-group textarea { width : 100% ; padding : 8px ; box-sizing : border-box; } .drop-area { border : 2px dashed #ccc ; padding : 20px ; text-align : center; margin-bottom : 15px ; } .drop-area .dragover { border-color : #000 ; } .file-list { margin-bottom : 15px ; } .file-list p { margin : 0 ; } .switch { display : flex; align-items : center; margin-bottom : 15px ; } .switch input { margin-right : 10px ; } button { padding : 10px 20px ; background-color : #007bff ; color : #fff ; border : none; cursor : pointer; } button :hover { background-color : #0056b3 ; } </style > </head > <body > <div class ="container" > <h1 > SQL Generator</h1 > <div class ="input-group" > <label for ="tableName" > Table Name</label > <input type ="text" id ="tableName" placeholder ="Enter table name" > </div > <div class ="input-group" > <label for ="baseUrl" > Base URL</label > <input type ="text" id ="baseUrl" placeholder ="Enter base URL" > </div > <div class ="drop-area" id ="dropArea" > Drag & Drop Files Here </div > <div class ="file-list" id ="fileList" > <p > No files added</p > </div > <div class ="switch" > <input type ="checkbox" id ="recreateTable" > <label for ="recreateTable" > Delete and Recreate Table</label > </div > <button id ="generateSql" > Generate SQL</button > </div > <script > const dropArea = document .getElementById ('dropArea' ); const fileList = document .getElementById ('fileList' ); const generateSqlButton = document .getElementById ('generateSql' ); let files = []; dropArea.addEventListener ('dragover' , (event ) => { event.preventDefault (); dropArea.classList .add ('dragover' ); }); dropArea.addEventListener ('dragleave' , () => { dropArea.classList .remove ('dragover' ); }); dropArea.addEventListener ('drop' , (event ) => { event.preventDefault (); dropArea.classList .remove ('dragover' ); files = Array .from (event.dataTransfer .files ); updateFileList (); }); function updateFileList ( fileList.innerHTML = '' ; if (files.length === 0 ) { fileList.innerHTML = '<p>No files added</p>' ; } else { fileList.innerHTML = `<p>${files.length} files added</p>` ; } } generateSqlButton.addEventListener ('click' , () => { const tableName = document .getElementById ('tableName' ).value ; const baseUrl = document .getElementById ('baseUrl' ).value ; const recreateTable = document .getElementById ('recreateTable' ).checked ; if (!tableName || !baseUrl || files.length === 0 ) { alert ('Please fill in all fields and add at least one file.' ); return ; } let sql = '' ; if (recreateTable) { sql += `DROP TABLE IF EXISTS ${tableName} ;\n` ; sql += `CREATE TABLE ${tableName} (\n id INTEGER PRIMARY KEY AUTOINCREMENT,\n name TEXT,\n url TEXT\n);\n\n` ; } files.forEach (file => const fileName = file.name ; const fileUrl = `${baseUrl} /${fileName} ` ; sql += `INSERT INTO ${tableName} (name, url) VALUES ('${fileName} ', '${fileUrl} ');\n` ; }); downloadSql (sql); }); function downloadSql (sql ) { const blob = new Blob ([sql], { type : 'text/plain' }); const url = URL .createObjectURL (blob); const a = document .createElement ('a' ); a.href = url; a.download = 'generated_sql.txt' ; document .body .appendChild (a); a.click (); document .body .removeChild (a); URL .revokeObjectURL (url); } </script > </body > </html >
然后打开,Table Name填api的分类名,Base URL填你R2存储桶的链接(什么,你不会连一个域名都没有吧,那可以关闭电脑去睡觉了),如果不知道的话,可以进去R2存储桶的管理界面,添加一个访问域名,记住,如果你想创建哪个分类的数据表,链接要对应R2存储桶的目录,比如ysmp,那你的链接就是https://example.com/ysmp,其实就是对应你R2存储桶图片的目录名
1
2
3
4
5
6
7
8
9
10
11
12
13
14
15
16
17
18
19
20
21
22
23
24
25
26
27
28
29
30
31
32
33
34
35
36
37
38
39
40
41
42
43
44
45
46
47
48
49
50
51
52
53
54
55
56
57
58
59
60
61
62
63
64
65
66
67
68
69
70
71
72
73
74
75
76
77
78
79
80
81
82
83
84
85
86
87
88
89
90
91
export default { async fetch (request, env, ctx ) { if (request.method === 'OPTIONS' ) { return new Response (null , { headers : { 'Access-Control-Allow-Origin' : '*' , 'Access-Control-Allow-Methods' : 'GET, POST, OPTIONS' , 'Access-Control-Allow-Headers' : '*' , }, }); } const url = new URL (request.url ); if (url.pathname .includes ("favicon.ico" )) { return new Response ('Not Found' , { status : 404 }); } const pathParts = url.pathname .split ('/' ); const tableName = pathParts[1 ]; const searchParams = new URLSearchParams (url.search ); const isJson = searchParams.has ('json' ); const quantityParam = searchParams.get ('quantity' ); const quantity = quantityParam ? parseInt (quantityParam, 10 ) : 1 ; const sql = `SELECT url FROM \`${tableName} \`` ; try { const rows = await env.PIC_DB .prepare (sql).all (); if (rows.results .length > 0 ) { let urls = []; if (isJson && searchParams.get ('json' ) && !isNaN (parseInt (searchParams.get ('json' )))) { const index = parseInt (searchParams.get ('json' ), 10 ); if (index >= 0 && index < rows.results .length ) { urls.push (rows.results [index].url ); } } else if (isJson) { for (let i = 0 ; i < quantity && i < rows.results .length ; i++) { const randomIndex = Math .floor (Math .random () * rows.results .length ); urls.push (rows.results [randomIndex].url ); } } else { const randomIndex = Math .floor (Math .random () * rows.results .length ); const randomImageUrl = rows.results [randomIndex].url ; return new Response (null , { status : 302 , headers : { 'Access-Control-Allow-Origin' : '*' , 'Location' : randomImageUrl, }, }); } const responseText = urls.join ('\n' ); return new Response (responseText, { status : 200 , headers : { 'Content-Type' : 'text/plain' , 'Access-Control-Allow-Origin' : '*' , }, }); } else { return new Response ('No matching images found' , { status : 404 , headers : { 'Content-Type' : 'text/plain' , }, }); } } catch (error) { return new Response ('Internal Server Error: ' + error.message , { status : 500 , headers : { 'Content-Type' : 'text/plain; charset=utf-8' , }, }); } }, };
部署完后进去设置,添加你api的域名,然后绑定D1数据库,名称为PIC_DB举个栗子 的api文档,请求方式也相同,属于高仿😀